


Creating a custom email signature is super easy and free to do in Google Docs! If your business emails end off with “Sent from my iPhone”, you’re doing something wrong.
Imagine this… You’re contacting a lead for the first time via email. They open your message to read through it and loved your email. Before they decide if they want to respond or trash it, they want to know more about what you offer or if you’re even worth the investment. But there’s no link to any of your platforms and they don’t want to waste their time by searching it up themselves.

Make Emails to Look Professional
Instead of making it harder for the customer to search for you, your website and social media links are right there and they can learn more about your business instantly. You get traffic to your website, and potential clients get to learn more about your business. They also think you’re professional & reliable since you have such an email signature.
Email signatures are crucial to have because:
- It creates brand recognition
- Shows professionalism
- It’s like a digital business card
- Gives you free website traffic
- Provides quick links and call to action (If you ever have a special offer/sale you want to promote, you can always place it on there to grab their attention!)
I suggest keeping it a maximum of four lines, including a logo or image of yourself and important links you’d like your client to browse through. The tutorial below is for Google Docs & Gmail.
Why Image Signatures are a Bad Idea
I’ve seen people design their email signature completely through Canva or Photoshop, but you can get reported as spam. There needs to be great text & image ratio in your email. They factor this in for spam because they know spammers rely heavily on images.
Not only this, but image signatures don’t allow you to place various clickable links. Say you’re using an image and you have that image set to click through to your website. What if they wanted to be redirected to a social media platform of yours, or wanted to call you directly? Having an HTML-type signature like the one I will be showing you, will allow you how to add various links making it easier for your customers/clients.
How to Create a Email Signature
Step 1 – Go to Google Docs
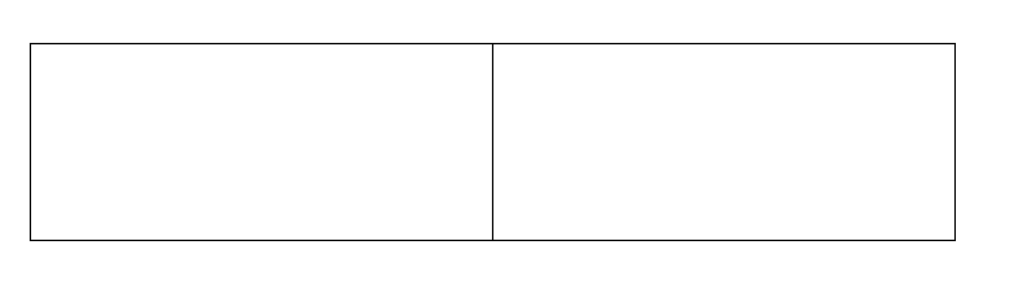
Click + to add a new document to your Google Docs. Start off by creating a 2×1 Table. This can be accessed under Insert → Table. Enlarge it by dragging it down near the bottom, and making sure there is enough room to place your logo/image and written content.
Step 2 – Gather the Content
For my own image/logo, I used Canva to create a circle image. For social media icons, you can get them for free off IconMonstr. Choose the PNG option, pick your desired colour & download!
Step 3 – Add your Logo/Image on the Left
When clicking on the left side box, you can go to Insert → Image → Place your brand image or logo. You can adjust the width of the box accordingly. My image is 1.14×1.14 and a small image file size in JPG format. By right-clicking the image and pressing the 3 dots, you can choose Size and Rotation to input this width and height.

Step 4 – Add your Information & Social Links
Input any details you’d like to include. I typically recommend your name, contact information (if you want to provide your phone number), your business name, your job title, and a link to your website. For the icons, you can link them directly to your social media by clicking the icon, clicking the link button (?) on the top menu and inserting your URL link. Add the icon by inserting an image, similar to step 1.
I would avoid using a fancy font on your signature, as many people will see it in a standard email font anyways. I would also recommend shortening the table at the end so it’s not too big!

Step 5 – Remove Border & Paste Signature into Gmail
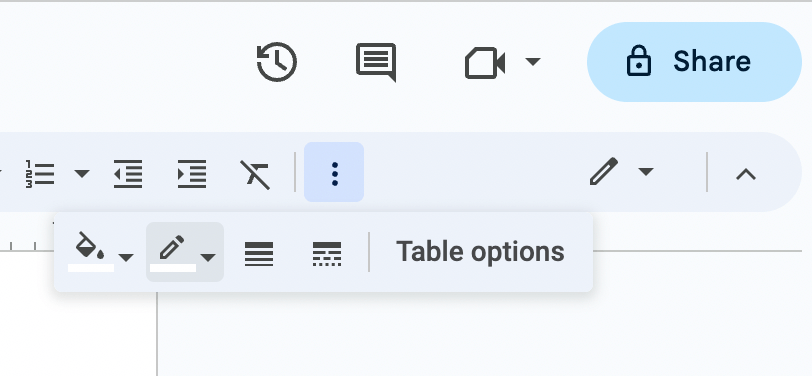
Google Doc is constantly making updates to their user interface, but typically you can find the table properties either on the top menu or by right-clicking the table. You can set the border color to white or change the border size to be removed. Copy the design and open your Gmail.
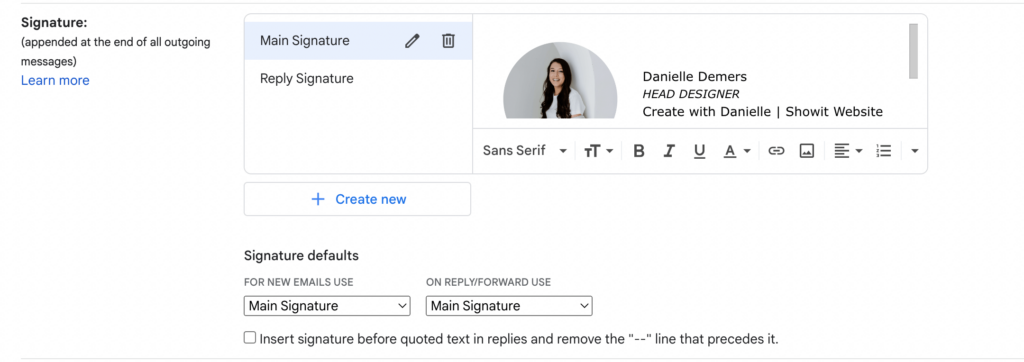
Click the gear icon to access general settings. Create a new signature & paste the design you’ve created. Once saved, your signature will now be placed automatically on the bottom of your emails. If you’re having issues saving it, these might be the reasons: your image is too big or a large image file size. I recommend compressing the image.
There You Have It!
Having an email signature will look more professional and can be updated to promote any deals you’re having or information you want people to see. It won’t cost you a penny to make and can be easily updated on Google Docs in the future for changing images and text.

Feminine, Clean, Modern
Jessie Showit Template
Compatible With:

Budget-Friendly Showit Templates: Designed to help beginners create stunning websites with confidence. Starting at $275.

Bold, Editorial, Luxurious
Hailey Showit Template
Compatible With:


Inviting, Clean, Calm
Stacey Showit Template
Compatible With:

flodesk Email Templates
Showit Website Templates

Welcome Email Template
Jessie Flodesk Template
Compatible With:

DIY Email Templates: Pre-designed email templates that help you connect with your audience and grow your business.

Welcome Email Template
Hailey Flodesk Template
Compatible With:


Package & Pricing Email Template
Audrina Flodesk Template
Compatible With:

flodesk Email Templates
Showit Website Templates
Shop Our Best-Selling Design Templates


We help create a strategic custom designs that reflects who you really are, helps you reach your biggest business goals, and positions you as the expert you are. From comprehensive brand strategy and logo design to custom Showit websites you can actually update yourself, we handle every detail so you don't have to. Let's create something you'll be proud to call yours.
We take the time to understand your vision (& bring it to life for you)
Certified Showit & Flodesk Design Partner, hundreds of happy clients worldwide, and 3 consecutive "Best Web Designer" awards in our county.

Maybe your website is pretty good, but something feels off and you're wondering if it's time for an overhaul? Our comprehensive website audit checklist helps you evaluate your current site like a pro. Find out exactly what your site needs.
Get Your free audit checklist
Not sure if you need a full redesign or just some tweaks?

