


Fonts are the biggest design factor when designing your website. Even though Showit offers free Google Fonts for commercial use, you may want to spruce up your design with a custom font. When designing client websites, I always use at least one custom font to personalize the design & make the website stand out. In this post, I’ll be showing you how to upload custom fonts to Showit, and how to convert it into a .WOFF file if needed. The great thing about Showit is that there is no coding required to add a unique font to your website!
Disclaimer: This post includes affiliate links. If you go through them to make a purchase, I will earn a commission. Keep in mind that I only share about companies that I truly believe in and use myself!For my details on affiliate links, please visit my terms of use.
Finding Custom Fonts
You’ll need to find a custom font you like. If you’re working with a brand designer, they may have a custom font in your brand guidelines which you’ll need the proper Webfont licensing to use on your website. If you’re on the search for a unique font, here are some of my go-to websites!
My Favorite Font Designers
Blanc Salvage: Get 15% off your first purchase right here with code CREATEWITHDANIELLE
Jen Wagner Co: Explore her unique stunning & popular fonts right here.
Other Great Font Websites:
When purchasing a font, you’ll need to purchase a Webfont License. This ensures you’re legally able to use the font on your website (trust me, they check). You’ll receive a .WOFF file immediately after purchasing.
Purchased the font, but there’s no .woff file?
If you know you have the Webfont license but there’s no proper file format received, you can convert it into a .WOFF yourself in minutes! Head over to FontSquirrel’s webfont generator, upload the font file you received, click “Expert” in order to check off .WOFF as the option, and download the converted font file.
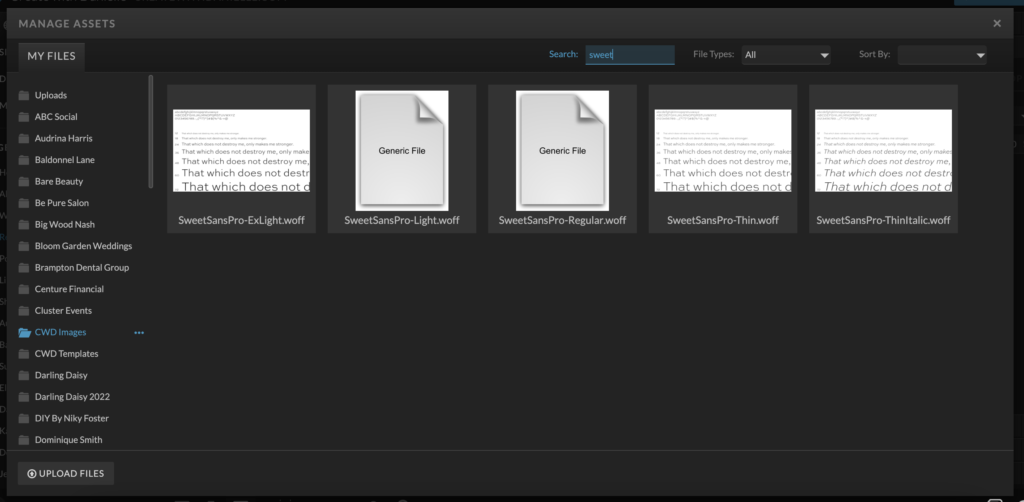
Uploading the Custom Fonts to Showit
Now that you have your custom font .WOFF files, you can add custom fonts to Showit. Open your website on the Showit editor, and click Media Library on the top left-hand side menu. You’ll upload the .WOFF files onto your Assets library.
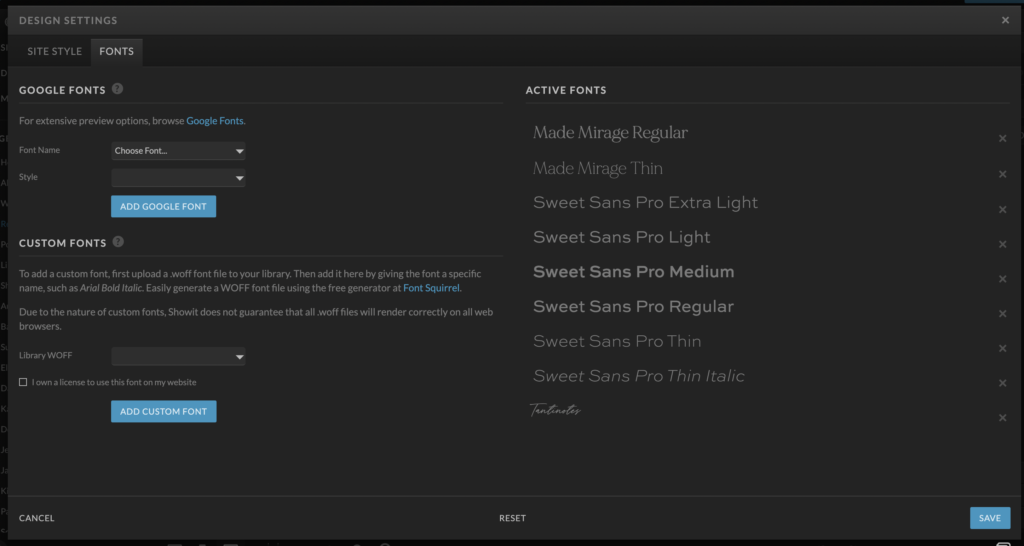
Adding The Font To Your Showit Design
Click “Design Settings” on the top left-hand side menu. You’ll see a Fonts tab at the top, and an area for Custom Fonts. Click the drop-down option next to “Library WOFF”, select your desired custom fonts, type the font name & add the font to your active font list. Upon pressing save, your custom fonts will now be available in the editor to use!
There You Have It!
You can either go back to the Design Settings to use it as a Site Style (affects your entire website), or use it directly through the Editor under text styles.
Need more resources for your website or online business? Having the right tools in your corner makes all the difference. We’ve rounded up our favorite resources that we use and recommend for your website design journey. Check out my resources page for more tools and exclusive discounts.
If you prefer to have a design that’s already made for you & comes with fonts already built in, you’ll love my Showit website templates.
Disclaimer: This post includes affiliate links. If you go through them to make a purchase, I will earn a commission. Keep in mind that I only share about companies that I truly believe in and use myself!For my details on affiliate links, please visit my terms of use.

Feminine, Clean, Modern
Jessie Showit Template
Compatible With:

Budget-Friendly Showit Templates: Designed to help beginners create stunning websites with confidence. Starting at $275.

Bold, Editorial, Luxurious
Hailey Showit Template
Compatible With:


Inviting, Clean, Calm
Stacey Showit Template
Compatible With:

flodesk Email Templates
Showit Website Templates

Welcome Email Template
Jessie Flodesk Template
Compatible With:

DIY Email Templates: Pre-designed email templates that help you connect with your audience and grow your business.

Welcome Email Template
Hailey Flodesk Template
Compatible With:


Package & Pricing Email Template
Audrina Flodesk Template
Compatible With:

flodesk Email Templates
Showit Website Templates
Shop Our Best-Selling Design Templates


We help create a strategic custom designs that reflects who you really are, helps you reach your biggest business goals, and positions you as the expert you are. From comprehensive brand strategy and logo design to custom Showit websites you can actually update yourself, we handle every detail so you don't have to. Let's create something you'll be proud to call yours.
We take the time to understand your vision (& bring it to life for you)
Certified Showit & Flodesk Design Partner, hundreds of happy clients worldwide, and 3 consecutive "Best Web Designer" awards in our county.

Maybe your website is pretty good, but something feels off and you're wondering if it's time for an overhaul? Our comprehensive website audit checklist helps you evaluate your current site like a pro. Find out exactly what your site needs.
Get Your free audit checklist
Not sure if you need a full redesign or just some tweaks?

