


Testimonials are important to add to your website to show social proof and credibility to your website visitors. There are many ways to showcase your testimonials on Showit in a stunning way. My favourite testimonial design is using Canvas Views where visitors can slide through them. Here’s a tutorial on adding a Showit testimonial slider to your website!

Showit Testimonial Slider Tutorial
1. Create Your Testimonial Design
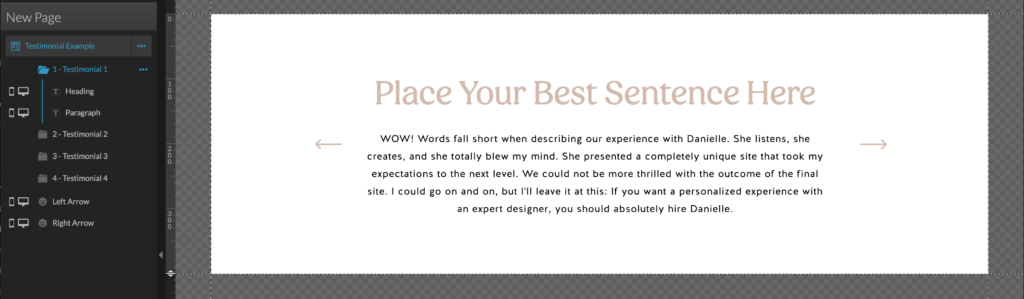
First, you’ll want to design the standard design that will be the same for each testimonial. You can add new elements at the bottom centre of the Showit editor. Add your headings, paragraphs, arrows (under icons & rotate one arrow to 180 degrees to make a left design). I love having a bigger heading that showcases the best sentence of the testimonial! This tends to grab people’s attention by seeing those important keywords in a bigger font before reading the smaller portion of the testimonial. I recommend keeping all testimonial text to be the same length to ensure a cohesive look when sliding through.

If you’re a photographer or any other type of business where images would benefit you, you can always add an image design alongside the testimonial as well. There are endless ways to design your testimonials! Whether it’s something simple as shown above, or by adding design elements. This could be a Canvas Background, Images, Borders, etc. Here is some design inspiration from past client websites I’ve designed and from my Showit website templates as well.


Once you’ve finished designing the layout you like, also make sure it looks great on mobile as well before moving to step 2. There’s nothing worse than completing all of these steps, and your mobile design wasn’t customized! Since you’ll be duplicating this design, this is important to do beforehand to save you time.
Want to Display Google Reviews?
If you’re collecting reviews on Google, you might be wondering how to display those reviews on your Showit site without manually copying and pasting each one into a slider. The easiest solution? Elfsight’s Google Reviews widget.
Instead of designing individual testimonial slides and updating them manually every time you get a new review, Elfsight automatically pulls your Google Reviews and displays them in a beautiful, customizable widget on your site for you to embed onto your Showit website.
✓ Automatic updates – New Google Reviews appear on your site automatically. No manual updating required.
✓ Easy to embed – Elfsight gives you a simple embed code that you paste into a Showit embed element.
2. Duplicate the Design Using Canvas Views
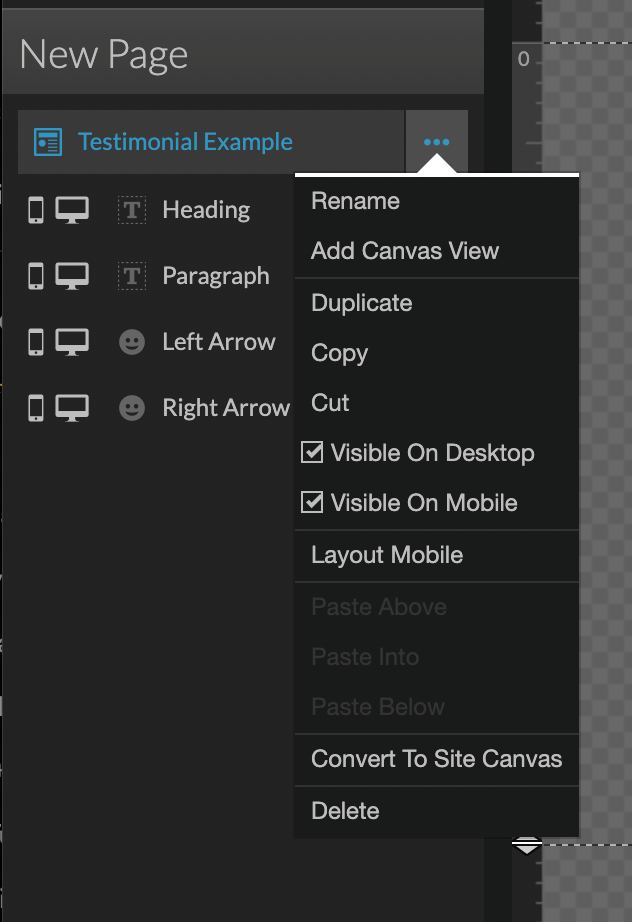
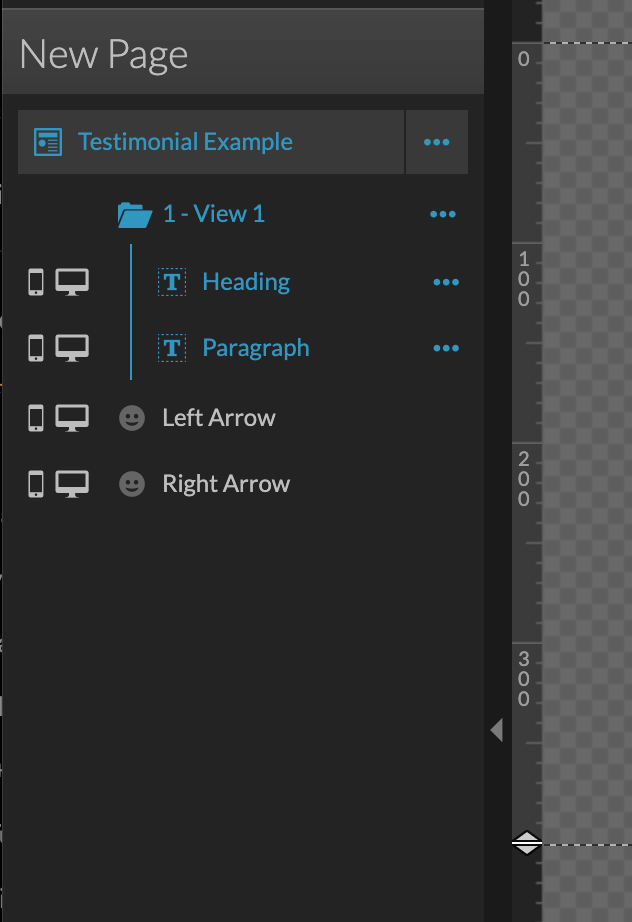
If you’re sticking to designing on Showit, you’ll need to add this design into a Canvas View. Right-click the 3 dots on your new section, and select Canvas View. Place the testimonial portion into the first canvas view. I usually don’t include the arrows or any design elements that will stay the same with all testimonials. In this case, I only dragged the main heading & testimonial paragraph inside.
Once you’ve added all testimonials elements in View 1, right-click the 3 dots on that canvas view, and click “Duplicate”. Duplicate it as many times as you’d like, depending on the number of testimonials you have. Input all of your different testimonials in the separate Canvas views. For example, View 1 will have your main testimonial that will show up first on the website. View 2 will have the second testimonial, and so on.
3. Activate the Arrows with Click Actions
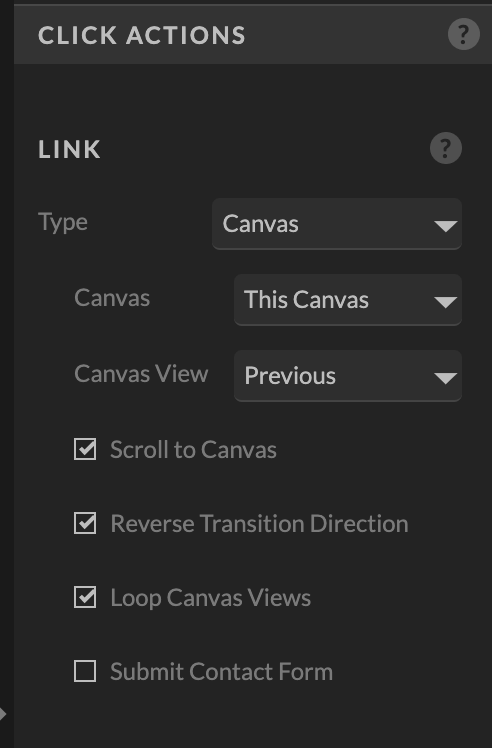
You’ll now have to set click actions to your arrows. Click actions are edited on the right-hand side of the Showit editor. You’ll assign both arrows to Canvas Type and This Canvas. Under Canvas View, you’ll set Previous for your left arrow & Next for your right arrow. Ensure “Loop Canvas Views” is checked so that it goes back to the beginning once all Canvas Views have been clicked through. I typically keep Scroll to Canvas for the mobile design experience, but it all depends on the design and length of your testimonial.

Enjoy Your Showit Testimonial Slider!
Now that the arrows are active, the testimonials will change when arrows are clicked on your website once published. You did it! Whenever you receive new testimonials in the future, you can duplicate more Canvas Views and keep adding as you go. If you’re wanting to add a certain effect for the sliding, this can be done under the Canvas Section settings under View Transitions. This allows you to create an automatic transition or a fading/sliding effect for each testimonial.
I hope this tutorial helped you create your awesome new Showit testimonial slider. Looking to get a testimonial slider already made for you? Check out my Showit template shop right here.
Disclaimer: This post includes affiliate links. If you go through them to make a purchase, I will earn a commission. Keep in mind that I only share about companies that I truly believe in and use myself! For my details on affiliate links, please visit my terms of use.

Feminine, Clean, Modern
Jessie Showit Template
Compatible With:

Budget-Friendly Showit Templates: Designed to help beginners create stunning websites with confidence. Starting at $275.

Bold, Editorial, Luxurious
Hailey Showit Template
Compatible With:


Inviting, Clean, Calm
Stacey Showit Template
Compatible With:

flodesk Email Templates
Showit Website Templates

Welcome Email Template
Jessie Flodesk Template
Compatible With:

DIY Email Templates: Pre-designed email templates that help you connect with your audience and grow your business.

Welcome Email Template
Hailey Flodesk Template
Compatible With:


Package & Pricing Email Template
Audrina Flodesk Template
Compatible With:

flodesk Email Templates
Showit Website Templates
Shop Our Best-Selling Design Templates


We help create a strategic custom designs that reflects who you really are, helps you reach your biggest business goals, and positions you as the expert you are. From comprehensive brand strategy and logo design to custom Showit websites you can actually update yourself, we handle every detail so you don't have to. Let's create something you'll be proud to call yours.
We take the time to understand your vision (& bring it to life for you)
Certified Showit & Flodesk Design Partner, hundreds of happy clients worldwide, and 3 consecutive "Best Web Designer" awards in our county.

Maybe your website is pretty good, but something feels off and you're wondering if it's time for an overhaul? Our comprehensive website audit checklist helps you evaluate your current site like a pro. Find out exactly what your site needs.
Get Your free audit checklist
Not sure if you need a full redesign or just some tweaks?

